

Previously, we managed to install a Nuxt.js framework and configure it to our needs: Frontend for backend developers: an introduction to Nuxt.js. Now, it’s time to create the frontend layer using this tool.
Communication with an external API
You can use an external service based on the REST API architecture to download data that will be displayed on your website. As backend devs, we have mastered creating new CRUD compliant resources, right?
That’s why, for this frontend, we’ve prepared a backend compliant with REST API, available under example URL: https://api.example.com. The service deploys two endpoints built like this:
// GET https://api.example.com/api/v1/recipes
{
"items":
[
{
"icon": "https://images2.imgbox.com/90/76/9F7EcUON_o.jpg",
"title": "Mojito (mohito)",
"id": "mojito",
"description": "Słodki i orzeźwiający drink na bazie białego rumu wraz z limonką, brązowym cukrem i miętą.",
"rate": 4.5,
"rates": 413,
"prepare_time": "10 min",
"prepare_difficulty": "łatwy"
},
{
"icon": "https://images2.imgbox.com/90/76/9F7EcUON_o.jpg",
"title": "Old Fashioned",
"id": "old-fashioned",
"description": "Legenda wielu barów. Whiskey w najlepszym wydaniu.",
"rate": 4.9,
"rates": 759,
"prepare_time": "10 min",
"prepare_difficulty": "łatwy"
}
],
"page": 1,
"total_pages": 300
}
// GET https://api.example.com/api/v1/recipes/old-fashioned
{
"icon": "https://images2.imgbox.com/90/76/9F7EcUON_o.jpg",
"title": "Old Fashioned",
"id": "old-fashioned",
"description": "Legenda wielu barów. Whiskey w najlepszym wydaniu.",
"rate": 4.9,
"rates": 759,
"prepare_time": "10 min",
"prepare_difficulty": "łatwy"
}
With the Node.js-based code, we’ll use the axios library for http(s) communication. It’s currently the most popular solution for such tasks, which means it’s also automatically supported by many frameworks.
Assuming that we have an API running at the https://api.example.com URL to deliver recipe-related data as https://api.example.com/api/v1/recipes resources for the collection and https://api.example.com/api/v1/recipes/[ID] as information about specific recipes, we can now configure our external service as a Nuxt.js proxy. With this, all requests sent by the frontend will be forwarded to your own domain and all communications with the service that delivers drink recipes will be server-side, solving potential CORS issues.
// nuxt.config.js
{
// ...
modules: [
// ...
'@nuxtjs/axios',
],
axios: {
proxy: true
},
proxy: {
'/api/': { target: 'http://api.example.com/', pathRewrite: {'^/api/': ''} }
}
}
Of course, you can use a similar method to support many independent services that deliver content to your frontend. All you have to do is register another proxy URL for another service. Piece of cake!
The instance of our library that handles http(s) requests is automatically available in all important elements of the Nuxt.js system (e.g. components).
A communication mechanism configured this way will be needed to handle data displayed in views. For that purpose, we also have to prepare a data access layer that will deliver data in a unified structure.
// src/repositories/RecipesRepository.ts
import axios, { AxiosInstance } from 'axios';
interface RecipeModel {
id: string
icon: string
title: string
description: string
rate: number
rates: number
}
interface RecipesRepositoryInterface {
getCollection(page: number, perPage: number): Promise<RecipeModel[]>
getById(id: string): Promise
countCollection(): Promise
}
const recipesRepositoryClient = axios.create({ headers: { 'accept': 'application/json' } });
class RecipesRepository implements RecipesRepositoryInterface {
public constructor(private client: AxiosInstance) {
}
public getCollection(page: number = 1, perPage: number = 12): Promise<RecipeModel[]> {
return this.client
.get<{ items: RecipeModel[] }>('/api/recipes')
.then((res) => res.data.items)
.catch((err) => {
console.warn(err);
return [];
});
}
public getById(id: string): Promise {
return this.client
.get('/api/recipes/' + id)
.then((res) => res.data)
.catch((err) => {
console.warn(err);
return null;
});
}
public countCollection(): Promise {
return this.client
.get<{ total_pages: number }>('/api/recipes')
.then((res) => res.data.total_pages)
.catch((err) => {
console.warn(err);
return 0;
});
}
}
export const repositoryRecipe = new RecipesRepository(recipesRepositoryClient);
The code above handles several functions:
- It defines the interface of the repository that handles recipe data delivery.
- It defines the data model that will be used in the frontend app (for convenience, it’s identical to the API data model).
- It creates a repository implementation using the Axios libraries for communication.
As you can see, we’re writing frontend code, but so far it looks and behaves just like the backend! We are using a class definition, interface implementation... and we even have a design pattern here—the repository.
Views and templates: what’s visible to the user and why
There are two elements that influence how content is displayed in Nuxt.js.
- The first element are the controllers directly linked with routing. This means that the files responsible for the view of each page are directly reflected in file structure. In our case, they are located in src/pages and src/layouts. Here’s an example: the direct view of URL that displays a specific recipe http://example.com/recipes/12345 is located in src/pages/recipes/_id.vue or src/pages/_id/index.vue. The documentation offers a great explanation of this structure. However, nothing’s stopping you from breaking the rules and setting up custom routing.
- The second element—which we’ll use to render view elements—are Vue.js components: reusable, configurable elements responsible for displaying every component of a website. The Vuetify library we chose during project configuration in the previous part is simply a set of predefined components that match one another in such a way that view elements can be grouped together into consistent, complex graphic interfaces.
From the technical point of view, the first element (a controller) is also a component in Vue.js terms. Without going into details, it means that all elements of a view have a unified code structure. Views (controllers) are simply directly linked to routing and are our point of entry into the app.

Page view
The preparation of our page’s frontend begins with the homepage. After going to src/pages/index.vue we start creating a template of our homepage where a list of several recently added recipes will be displayed.
We need to write suitable code:
[raw]
[/raw]
The HTML code we want to render is in the <template> tag. It’s one of the three tags we use to describe the behaviour of our webpage. The other two are: <script>, which stores the JavaScript that configures the view behaviour, and <style>, which is responsible for CSS styles of the rendered HTML snippet.
All the tags in the code above can be treated like functions in backend development. They take input parameters, perform a specific action, and render an output response. If a tag is not implemented (isn’t a component), it is treated like regular HTML.
This code displays a block with a recipe that includes a photo, title, description, and rating. Right now, we only have one block, but it’s already adapted to various resolutions and mobile devices by using the Vuetify library’s grid system directly based on flex-box.
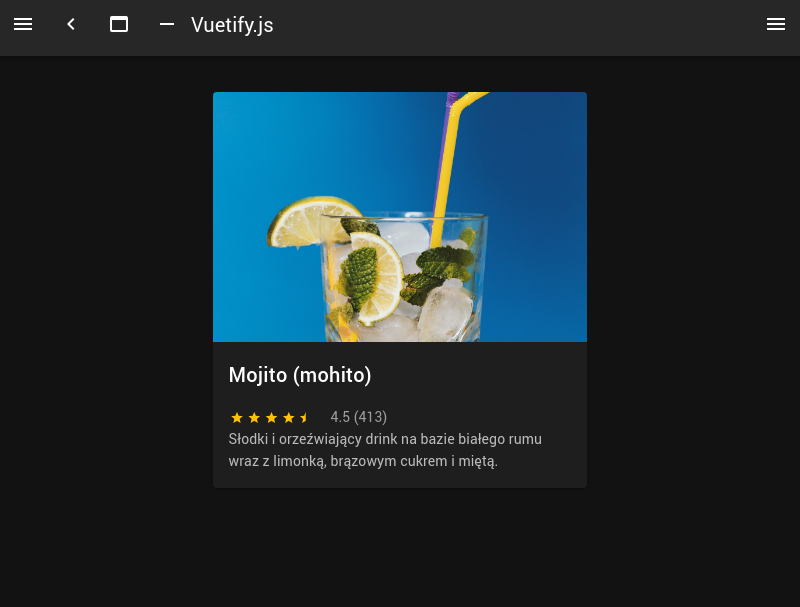
Not bad for just a few lines of HTML!
Let’s see how our view will look when we add more recipes to the mix. We can use the previously-made library to handle REST API, updating the rendered HTML in the src/pages/index.vue file:
[raw]
[/raw]
We have used the previously prepared repository that fetches data from REST API, and then we display the collection by rendering the HTML code.
Both data and asyncData methods are responsible for creating an object representing the data stored by the current component. The difference is that asyncData lets you fetch this information in an asynchronous way from external resources. Simultaneously, the data is fetched and rendered on the server side at the initial visit of the user. Have I mentioned the importance of SEO?
Note that from now on, the blocks are fully-fledged references that direct you to the page containing the details of a given recipe due to the:to="'/recipes/'+recipe.id" nuxt code within the <v-card> component.
As a result, we have a pretty neat page with recipes:

Let’s now proceed to everything that surrounds our content, i.e. the header and the footer. The black colour here is not too cheerful either and does not match the character of our frontend.
The first thing to do is to restore the default colours for our graphics library. To do that, you need to modify the vuetify section of the nuxt.config.js file:
vuetify: {
customVariables: ['~/assets/variables.scss'],
},
The views of individual routings are packed into the global template. The template is responsible for rendering common components for all pages, and in our case it’s located in the src/layouts/default.vue file (a component again, which is great news as we already know how to work with those!).
Let’s change its code to something more apt:
[raw]
[/raw]
The <nuxt/> component shows the location of rendering all the views responsible for routing. Apart from cleaning the template code, we have also defined a new header with a logo. The graphic file is located in the src/static/logo.png directory and it can be embedded in the HTML code, as presented in the example above.
Apart from the graphic file, the template also includes a defined CSS style named app-header, which is defined in the <style> tag with scoped attribute. The scope definition affects the visibility of this CSS class selector. In this case, the app-header class will only work for the code within this component. This is one of the best practices of coding in Vue.js.
To meet all the requirements, now we just need a single recipe view.
Let’s create the template for Nuxt.js routing i.e. src/pages/recipes/_id.vue:
[raw]
[/raw]
We use the previously prepared components from the Vuetify library. Each component has an excellent documentation comprising a description and a visualisation of all parameters. What happens in the JS part of the code is even more interesting. Firstly, we use the validate function, which is run both on the server and client side, and automatically validates if our recipe base includes a recipe represented by a given identifier. If such a recipe does not exist, a 404 error page is automatically displayed. The other method, i.e. asyncData, loads data about a given recipe and stores it in the variable used for rendering the view. Easy, isn’t it?
Now, you can check and see how your PoC of the frontend in Nuxt.js looks and behaves.
Vue.js components in a glimpse
When defining individual views, we were using the components — the true superpower of Vue.js. As I have mentioned before, each view of a page or a template is in practical terms a component.
Components are responsible for the preparation and displaying of portions of a template visible to the end-user. They can vary in terms of the HTML code and the JS logic. There is a style guide and a collection of best practices on appropriate preparation of components.
The components can communicate with one another in three different ways:
- from parent to child — using the props component. We were using this mechanism the entire time when we were creating views, defining the parameters of rendered components. For example, using <v-col cols="5"> means that we pass a parameter called cols with a value of 5 into a component called <v-col>. The component that receives the parameters defines the names and types of parameters we can pass.
- from child to parent — using events. The child responds to a specific behaviour by emitting an event with a specific name and parameters. The parent calls the child component and defines its function that listens for the event and reacts to it by e.g. modifying its state.
- everything with everything — this can be achieved using an additional library/manager to handle Vuex states. To put it simply, you can treat this solution like a global register where every component can call for information or modify the state of such a register by using dedicated mechanisms.
Let’s create our first, basic component src/components/RecipeGridItem.vue
[raw]
[/raw]
As you can see, this is a snippet of the code responsible for rendering a single block in the grid of recipes. You pass one required parameter—called recipe— into the component.
Now, let’s proceed to our page with the grid (src/pages/index.vue) and use the new component:
[raw]
[/raw]
Opart from the use itself, the component has to be defined in the <script> block:
[raw]


